Have you have wanted to grab a smaller image on a screen rather than a whole screen shot? Windows 7 includes a feature called the Snipping Tool which allows you to do this. You can also do larger (full window) screen captures. The image you snip can then be inserted into a file or email or saved as an image.
Opening the Snipping Tool
1. Open the Start Menu and select “All Programs.”
2. Select the “Accessories” Folder. Then select “Snipping Tool.”
Capturing/Creating a Snip
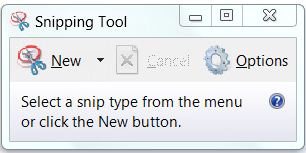
1. Open the “Snipping Tool.”
2. Click the arrow next to the New button, select Free-form Snip, Rectangular Snip, Window Snip, or Full-screen Snip from the list.
3. Select the area of your screen that you want to capture. Note: The snipping tool menu will not appear in the snip.
4. Make any adjustments to the snip that are needed using the menu.
5. Place the image where it is needed, save the image, send it using the menu.
Capturing/Creating a Snip of a Menu
1. Open the “Snipping Tool.”
2. Press the “Esc” key on the keyboard.
3. Open the menu that you want to capture and press “Ctrl” and “PrtScn.”
4. Click the arrow next to the New button, select Free-form Snip, Rectangular Snip, Window Snip, or Full-screen Snip from the list.
5. Select the area of your screen that you want to capture. Note: The snipping tool menu will not appear in the snip.
6. Make any adjustments to the snip that are needed using the menu.
7. Place the image where it is needed, save the image, send it using the menu.
These instructions, along with illustrations, can also be found in SharePoint > Software Users Group > Shared Documents > Windows 7 Folder > Snipping Tool.