This month’s Accessibility Quick Tip provides two ways to easily change Microsoft Word's default style settings, which also can help with ADA Title II compliance.
Customize Heading Styles
- Hover cursor over “Heading 1” (or whichever heading level you want to customize).
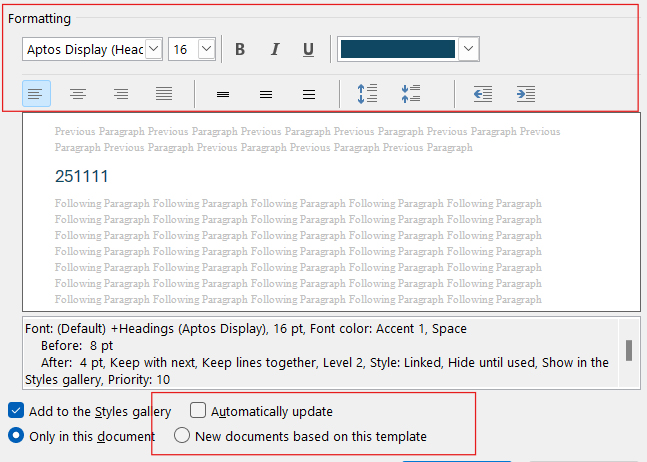
- Right-click and select Modify.
- Change the font, color, and size as desired.
- At the bottom of the dialog box, check “Automatically update” to update all headings of that level currently in the document.
- Check “New documents based on this template” if you would like to create multiple documents using this same look for the headings.
Make a Custom Template
- Create a document with customized headings and styles.
- Select Save As from the File menu.
- Save as type: Word Template (*.dotx) from the drop-down menu of file types.
- Save to Documents > Office Templates.
- To use this template, select the template from personal templates when creating a New file.
For help creating customized styles, contact an instructional designer assigned to your college.
More details at: https://go.unl.edu/accessibility-udl