There are instances when it would be nice to add some additional notes to an email that has been received. There are four ways to do this: Custom Flags, Modifying the Subject Line, Modifying the Body of the Message, and Attaching a Note. Your choice will depend on how easily you wish to view the note and how long your note is.
Custom Flags
This may be a good option if you have short notes or do not need to see the text for the note right away (it just needs to be there for you to reference).
1. Select a message in the list messages or open a message.
2. In the “Tags” group, select “Follow Up.”
3. Select “Custom” from the drop-down list.
4. In the “Custom” dialog box that opens enter your note in the “Flag to:” field, set “Start Date:” to “None”, and set “Due date:” to “None.”
5. Click “OK.”
A flag appears with the message. You can click on it to see the note, but it will note appear in your Outlook Task List.
Modifying the Subject
This may be a good option if you have short notes or need to see the text for the note right away.
1. Open a message.
2. Click in the “Subject” field where you would like to type the note. A blinking cursor will appear.
3. Type the note.
4. Close the message.
5. Select “Yes” to save changes that have been made, when the dialog box appears.
The modified subject line will be visible to you in your list of messages.
Modifying the Message Body
This option is good if you have a longer note.
1. Open the message.
2. In the “Move” group, select “Actions.”
3. Choose “Edit Message” from the drop-down list.
4. Set your cursor where you wish to type the note in the body of the message.
5. Type the message.
6. Close the message.
7. Select “Yes” to save changes to the message, when the dialog box appears.
The body of the message will display the notes anytime the message is viewed.
Attaching a Note
This option is good if you have longer notes or you do not want to edit the body of the message.
1. Open “Notes” on the “Navigation Pane.”
2. In the “New” group, select “New Note.”
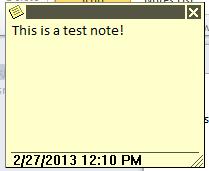
3. Type the note on the yellow “postit” that appears. NOTE: Any time you click away from the note it will close. Double click on it to open it again.
4. Return to the “Mailbox.”
5. Open the message needing the note.
6. In the “Move” group, select “Actions.”
7. Choose “Edit Message” from the drop-down list.
8. Return to “Notes.”
9. Click and drag the note to the body of the email message.
10. The note will be saved as an attachment on the message.
11. Close the message.
12. Select “Yes” to save changes to the message, when the dialog box appears.
13. Since it is saved with the message the note may be deleted from “Notes” by selecting the note and clicking “Delete.”
The note will be available as an attachment to the message.
These instructions can also be found in SharePoint > Software Users Group > Shared Documents > Outlook-Office 365 Folder > Adding a Note to a Received Email Message.